This article focuses on the natural hand position, playing with the finger, hand and forearm as one unit and using your arm weight to put down a key. My teaching is based on the Taubman Approach: instead of strengthening and isolating the fingers we will simply work on perfecting the movements involved in piano playing so we can work with our body and not against it!
The natural hand position
Adopting a natural hand position will help you maximise freedom and flexibility on the piano and minimise tension. Obviously your hand will not have this exact shape all the time (particularly when playing larger chords or intervals) but it is important to know how to find it and return to it as often as possible. This is your home base.
Note: Notice how the natural hand position typically spans 4 white keys – not 5!!!
Top view:

Side view:

You can find your natural hand position very easily just by dropping your hand by your side. This is your hand at rest. As you pick up your hand and move it to the piano pay attention not to change anything! Many students have been taught a 5-finger position and have a few bad habits from previous playing/instruction which tend to kick in automatically as soon as the hand approaches the piano!!! Here’s a video to help you out:
Lifting and dropping aka the “Chinese Cat”
Next, we need to learn how to put down a key. When we play the piano we want to use our finger, hand and forearm as one unit. Sounds tricky? Not really: it’s basically the same movement as one of those cats you might have seen in various shops:
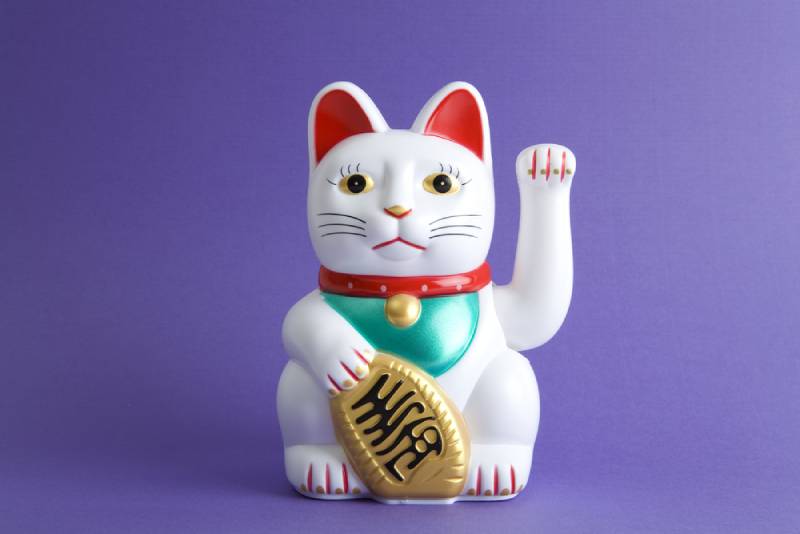
Just move your hand and forearm as one unit from your elbow joint and let the arm weight put down the key instead of pressing it down with your playing finger. You should feel balanced on each note and a sense that all fingers are equally strong.
Note: Obviously this technique alone doesn’t allow for legato (or connected) playing – but don’t worry, we’ll get to that in a later post!
In and out
If you look at your hand you’ll see that you have both long and short fingers. It’s easy to play white keys with the short fingers (1 and 5) and black keys with the long fingers (2, 3 and 4) but when we try to play a long finger on a white key we often end up curling it and short fingers on black keys tend to make us twist our hand. Both habits cause tension/discomfort and prevent us from building speed at the piano.
Curling:
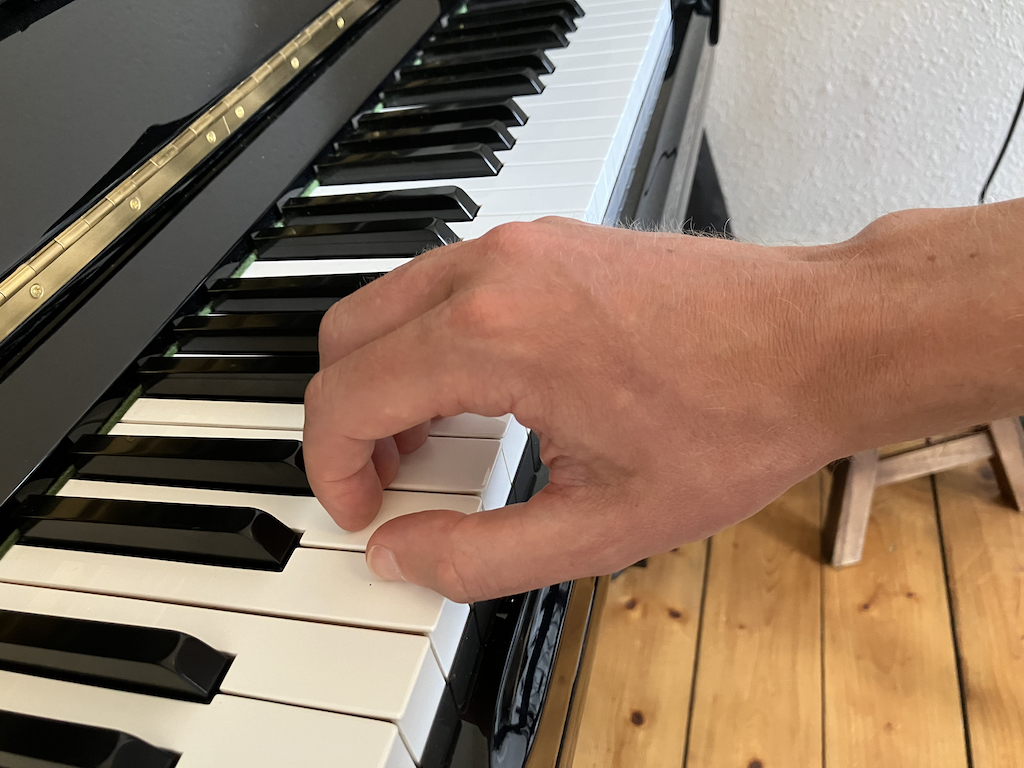
Twisting:

In order to equalise our fingers we have to learn to move our playing unit in and out. In other words we need to move our finger, hand and forearm as one piece towards the piano or away from the piano. Here’s how this works in the context of a basic 5-tone scale:
Conclusion
You might have noticed that we’ve been playing with a very basic and unsophisticated sound with gaps in between the notes as opposed to a “smooth and connected” sound (legato). I really recommend staying away from legato playing until you’ve fully internalised the concepts on this page as any attempt to play legato at this point will likely introduce a fair bit of stretching and twisting!!!
Once you’ve mastered the exercises on this page, playing simple melodies using the white keys only such as the ones in this article is time well spent! Just aim for a natural hand position, good fingering and lift+drop on each note of the melody. Be patient and you will be building a good foundation that will get you ready for legato playing in no time!